Candy Clicker Tutorial Pt 2
In the last tutorial, we made a clickable piece of candy and a score counter. In this tutorial, we will scale the game to mobile devices using some clever math and p5.play’s camera feature.

Where did we leave off?
At the end of the last tutorial, our code looked something like this:
// An object representing the candy
var candy = {
    // "image" is the variable inside candy which will hold the loaded image
    // Right now it is "null", which means nothing. We will load the image
    // during the "setup" code.
    image: null,
    x: 100,
    y: 100
}
var score = 0

function setup()
{
    createCanvas(windowWidth, windowHeight);
    // Load the image into a variable
    candy.image = loadImage("candy.png")
}

function draw()
{
    background(255);
    imageMode(CENTER)
    // Resize width and height to be 100x100
    candy.image.resize(100,100)
    // Draw the image based on variables in the candy object
    image(candy.image, candy.x, candy.y)
    // Set text size
    textSize(24)
    // Draw the score text
    text("Score: " + score, 10, 30)
}

function mousePressed(){
    var d = dist(candy.x, candy.y, mouseX, mouseY)
    if(d < 40){
        score = score + 1
    }
}
Removing padding
Try changing the number in background to 200. That will make the background of our sketch gray. Your draw code should now look like this:
function draw()
{
    background(200);
    imageMode(CENTER)
    // Resize width and height to be 100x100
    candy.image.resize(100,100)
    // Draw the image based on variables in the candy object
    image(candy.image, candy.x, candy.y)
    // Set text size
    textSize(24)
    // Draw the score text
    text("Score: " + score, 10, 30)
}
Run the code. Notice the annoying white bars on the sides of our sketch? And the scrollbars? Lets remove those. To do so, we actually have to edit the style.css file instead of the script.js file we have been editing.
The white outline is because our HTML document, which our p5.js canvas sits inside of, has something called padding. Padding means that everything inside an element is pushed inward a few pixels. Similarly margin means that elements outside are pushed away a few pixels. Lastly, overflow is how a document handles content outside of the screen. To fix our issue, we want to remove any padding and margin, as well as hide any overflow. (Don’t show anything outside the screen) Add the following code to style.css:
html, body
{
  padding: 0;
  margin: 0;
  overflow: hidden;
}
Virtual Camera & Coordinates
To scale our game, we are going to use a virtual “camera” which determines where the screen is positioned in our game’s “world”. The camera moving changes where coordinates are located on the screen. That means that (0,0) might not be the top-left of the camera.
IMPORTANT! We will be using two types of coordinates from now on. World coordinates means the position in the game world, which is adjusted based on the camera. Screen coordinates means the coordinates based entirely on the screen, as if we didn’t have a camera. (The top left is always (0,0) in screen coordinates) These will make more sense once you start using them.
Adding P5.Play Library
To use the virtual camera, we need a special library which adds to p5.js’s features. The p5.play library adds many videogame features, including a virtual camera. To add the library, you have to add a <script> tag to your HTML! Add this tag below where p5.js is added.
<script src="https://cdn.jsdelivr.net/gh/jeremyglebe/p5.play@master/lib/p5.play.js"></script>
Your complete HTML code should now look like this:
<!DOCTYPE html>
<html>
  <head>
    <meta charset="utf-8">
    <meta name="viewport" content="width=device-width">
    <title>repl.it</title>
    <link href="style.css" rel="stylesheet" type="text/css" />
    <script src="https://cdn.jsdelivr.net/npm/p5@1.3.1/lib/p5.js"></script>
    <script src="https://cdn.jsdelivr.net/gh/jeremyglebe/p5.play@master/lib/p5.play.js"></script>
  </head>
  <body>
    <script src="script.js"></script>
  </body>
</html>
Camera Positioning
p5.play automatically adds a new variable called camera. camera is an object which contains several variables, including another object: camera.position. To center the camera on the piece of candy, we only need to match the camera’s position to the x and y values of the candy. Add this to your draw step, before you draw the background:
// Reposition the camera
camera.position.x = candy.x
camera.position.y = candy.y
Your draw code should now look like:
function draw()
{
    // Reposition the camera
    camera.position.x = candy.x
    camera.position.y = candy.y
    // Draw the background
    background(200);
    // Draw images from their centers
    imageMode(CENTER)
    // Resize width and height to be 100x100
    candy.image.resize(100,100)
    // Draw the image based on variables in the candy object
    image(candy.image, candy.x, candy.y)
    // Set text size
    textSize(24)
    // Draw the score text
    text("Score: " + score, 10, 30)
}
Resizing/Scaling
Now we should make sure the images are zoomed in/out depending on the size of the screen. (So that they aren’t tiny on big screens, or huge on small screens)
We first want to come up with a base size, or a size that we base all the scaling on. Since our game doesn’t take up much space, let’s use a very small base size and just make the image bigger when needed.
We will create two new variables, myBase and myZoom which represent the base size and the camera zoom. For now, the zoom will just be 1.0, which means not zoomed in or out. Add them at the top of the code, with your other variables.
// An object representing the candy
var candy = {
    // "image" is the variable inside candy which will hold the loaded image
    // Right now it is "null", which means nothing. We will load the image
    // during the "setup" code.
    image: null,
    x: 100,
    y: 100
}
var score = 0
var myBase = 200
var myZoom = 1.0
Next, we need to do two things: 1. Determine which side of our screen is smaller. (We will scale using the smaller side) 2. Calculate the zoom as a ratio of real size over base size.
If any of this math is unfamiliar to you (ratios, for instance) don’t worry about it too much - this is something you can re-use for any project without changing the math.
Let’s do the calculations in setup. We will use if-statements to determine which side is smaller. Then, we will calculate the zoom and store it in myZoom. Lastly, we will copy the value of myZoom to camera.zoom.
function setup()
{
    createCanvas(windowWidth, windowHeight);
    // Load the image into a variable
    candy.image = loadImage("candy.png")
    // Calculate the zoom of the camera
    if(width < height){
        myZoom = width / myBase
    }
    else {
        myZoom = height / myBase
    }
    camera.zoom = myZoom
}
So why do we have myZoom if camera.zoom already exists? We might be changing the camera.zoom variable any time we want to do a camera effect, so it is nice to remember the original zoom level using the variable myZoom.
The “Click”
If you test your game now, you’ll notice that your click is no longer working. That is because mouseX and mouseY, used in your mousePressed code, are based on screen coordinates and not world coordinates. So those variables are no longer ever near your candy’s position.
Luckily, p5.play includes a new version of these variables, which uses world coordinates: camera.mouseX and camera.mouseY. Replace the variables in mousePressed with the new versions:
function mousePressed(){
    var d = dist(candy.x, candy.y, camera.mouseX, camera.mouseY)
    if(d < 40){
        score = score + 1
    }
}
There is still a problem. The 40 that we used to make sure the click was near our candy hasn’t been scaled based on the zoom. So now I have to click perfectly in the center of the candy to increase my score. All we need to do is scale 40 by the same amount as everything else, which we can do by multiplying it by myZoom! Try it:
function mousePressed(){
    var d = dist(candy.x, candy.y, camera.mouseX, camera.mouseY)
    if(d < 40 * myZoom){
        score = score + 1
    }
}
Button Pressed Camera Effect
Lets add one more feature, just for fun. The camera will zoom in for a moment when we click the candy, making it look like it is being pressed. We will increase the camera zoom in the mousePressed code, and reset it in a new code block called mouseReleased.
function mousePressed(){
    var d = dist(candy.x, candy.y, camera.mouseX, camera.mouseY)
    if(d < 40 * myZoom){
        score = score + 1
    }
    camera.zoom = myZoom + .5
}

function mouseReleased(){
    camera.zoom = myZoom
}
Cool right?
Testing on Mobile
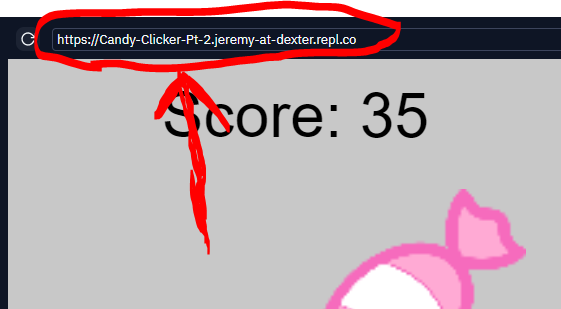
To run this on your phone, try opening the link right above the game window in your phone’s browser.
You should see that it works quite nicely!
Conclusion
You now have a clicker game fully working on mobile. It will scale to any device and look decent on all of them! In the future, we may integrate a multiplayer system so that everyone can add to the score together. Games like this also normally include upgrades you can buy with your points you getting.